Monday, March 19, 2012

Easter Wobble Eggs

Who says easter eggs need to be made out of eggs? This is a simple craft for all ages and can be decorated with unlimited materials, just use your imagination.

What you will need:
  • Plastic Eggs
  • Clay - one small ball per egg
  • Tape - or - glue (if you prefer)
  • Something to decorate with
    • We used stickers
To start you need to open your pastic egg so that you can insert the clay onto the bottom piece.  This will allow your egg to wobble.
Once you have inserted the clay into the bottom piece of the egg, attach the top and tape closed.
Thats it! all you need to do is decorate.
There are many applications that this Wobble Egg can be used for and various finishes you can apply to it, use your imagination to create anything you want!

Happy Crafting All

Thursday, March 15, 2012

Paper Roll Binoculars

This is so far my daughters favorite craft we did.  She has spent more time playing with these than ANYTHING else we've done. My little explorer.

What you will need:
  • 1 Paper towel roll - or - 2 Toilet paper rolls
  • Construction Paper
  • Glue (liquid or stick)
  • Stickers to decorate with
  • 2 Elastics
If you are using a paper towel roll, you will need to cut this in half.
Take the construction paper you want to use and cover the backin glue.
Take one of the rolls and wrap the paper around it.  I folded the ends into the roll to clean up the edges.
Grab 2 thin strips of paper to glue around the rolls; this will give it extra support but also make it look cooler. Place some glue on one of the seams of the rolls and stick the 2 rolls together. than wrap and glue the 2 strips around these. Once all glued place the elastics around the unit until it drys.

 When everything is dry remove the elastics and cover in stickers.
I have a young child so a string on this isn't preferable for us, but if your child is older feel free to attach a piece.

Happy Crafting All

Wednesday, March 14, 2012

Pipe Cleaner Rings

I have based this one off of a flower, but you can make anything you can imagine.  Please contact me for help if you need it.

What you will need:
  • Multiple pieces of pipe cleaners - I used 4 full and 1/2 pieces
  • Finger that piece will be worn on
Take the main colour pipe cleaner (White); should be a min. of 3 pieces for a flower, and twist together (loosely).
Twist around finger, again loosely as it will tighten as you go. fray out the ends once on your finger.
Take one end and tightly twist into a circle; this creates a petal
Repeat to all the ends
You can now pinch the petals to form a more petal like shape; though this is not required.
Now for the center of the flower. Take the 1/2 piece of pipe cleaner (yellow) and attach it to the ring on the bottom. To do this insert the end where you twisted the white pieces than twist the 1/2 piece to intertwine.
Push through the center and create another circle (tightly).
Take the last piece of pipe cleaner (green) and fold in half. unfold and twist center to the underside of the petal so that it doesn't loosen.  Once done twist each end into a circle and pinch into your leaves.
 Once everything is in the right placement (whatever you desire) its time to try your ring on!

Tuesday, March 13, 2012

Clay Spoon Bugs

You will need some air drying clay for this project, but it is dirt cheap. i picked up a huge bucket for 10$ at micheals, and i had a 40% off coupon so i only spent 6$ on it. so keep an eye out.  You could also use modelling clay or other materials but Air Drying Clay will give you the best results.

This is a 2 stage project, so you will need something else to do once stage one of this is complete. maybe you can make a whole group of bugs to work with.

What you will need:
  • Air Drying Clay; or other material
  • Q-tips; each tip makes 2 legs so use as many as you want legs.
  • plastic spoon
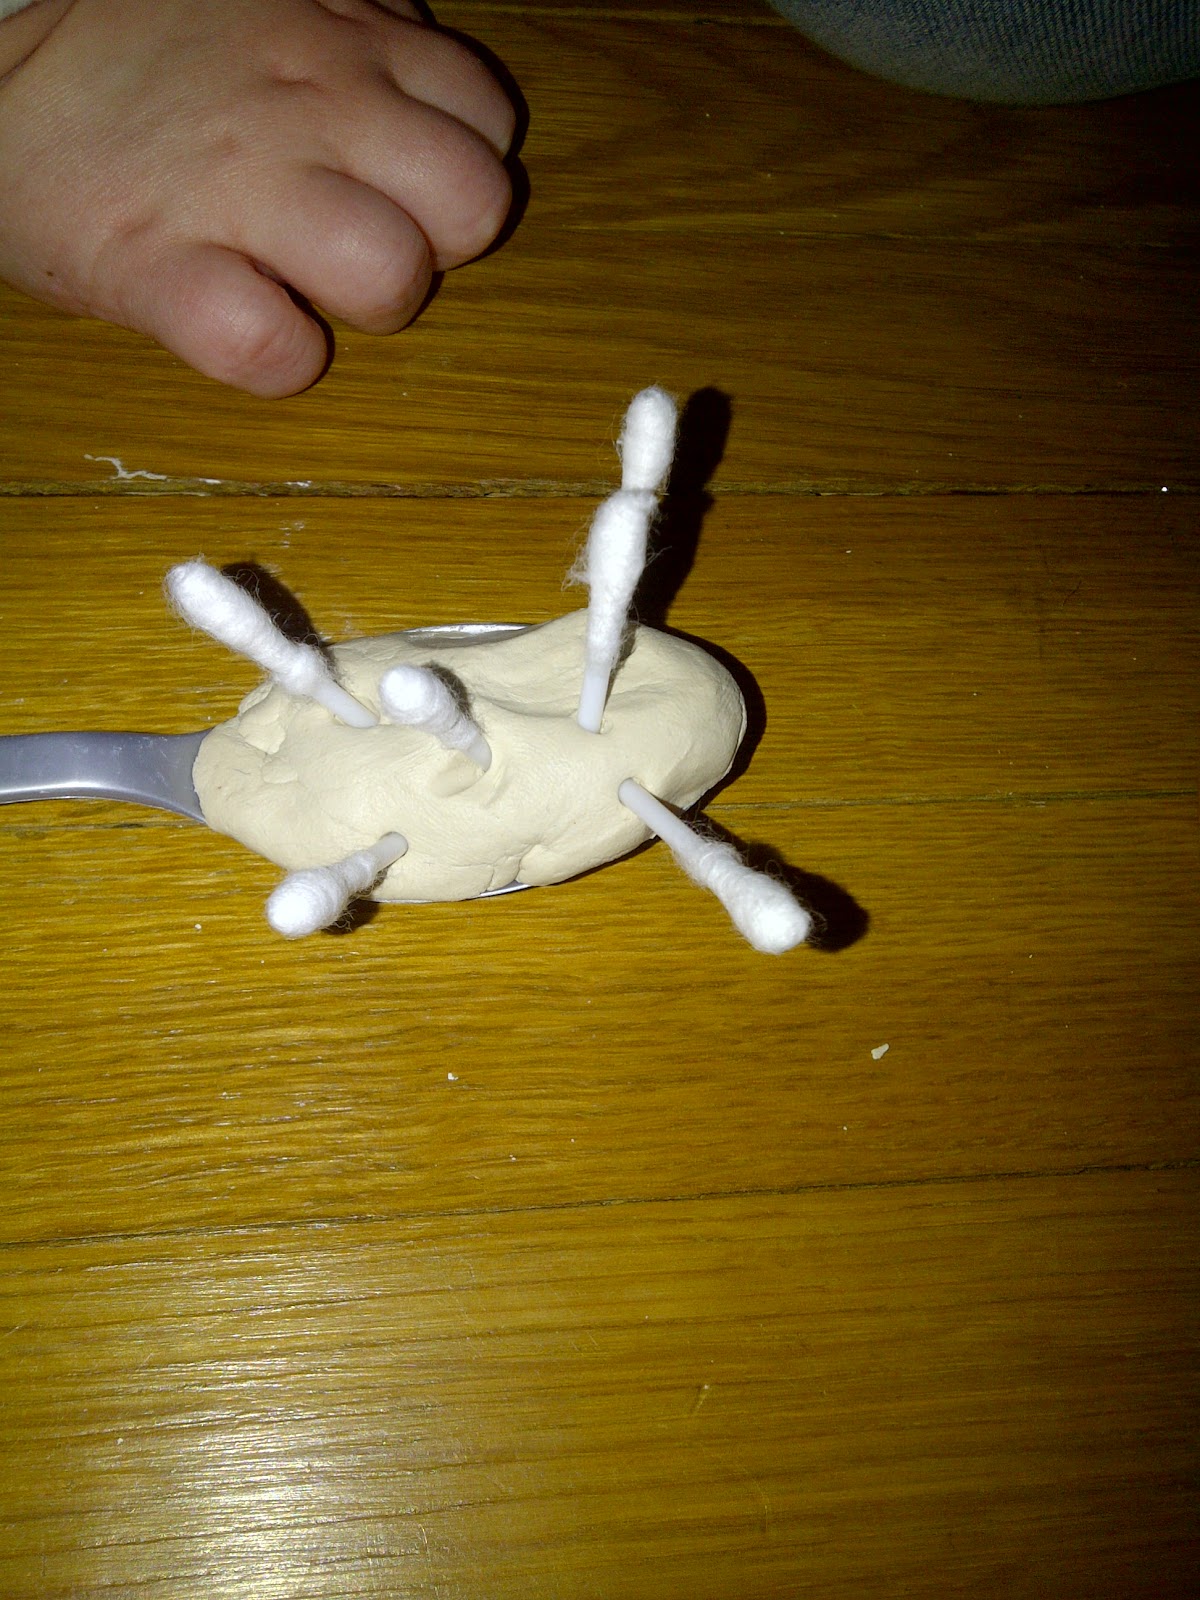
Take your plastic spoon and a ball of Clay and mold the clay to form on the spoon.
Grab your Q-tips (which have been cut in half to make 2 legs) and insert them into the stomach part of the bug.
If there is anything else you want to insert now is the time to do so, once the clay is dry you will have to glue anything else you want on.
Now set aside and allow to dry - This can take up to 2 days but generally will be dry in a day (i say 2 in case you make a VERY large bug)

 Once your bug friend has dried it is time for you to make them beautiful. you can use any colouring material you like, we used paint.
Set them aside once finished decorating and allow them to fully dry before playing with them.

Happy Crafting All

Thursday, March 8, 2012

Popsicle Stick - Bookmarks

My daughter LOVES for me to read to her, but every great book needs something to save your pages.  This easy craft can be made in about 10 mins if you don't have much time.

What you will need:
  • 2 Popsicle Sticks - large or small; it doesn't matter
  • Glue Stick
  • Tape
  • Construction Paper - various colors
    • you can also use crayons, markers and paint if you have more time.
    So to start, put some glue on the end of one of the popsicle sticks (about 1/2" to 1" down), than place second popsicle stick ontop of that.  For extra support, place a peice of tape around the top of the two sticks to help hold it together.
    Now its time for your topper! you can make absolutly anything to place on top for your bookmark. Draw, cutout and assemble your topper so that you can connect it to your popsicle sticks.
    Glue topper onto popsicle sticks.
    Now find a book and try it out.
    Nice, simple and fast.  ENJOY!

    Please remember to send me your images